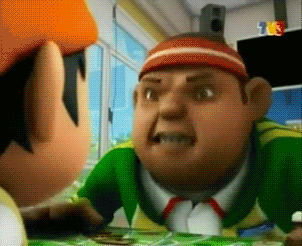
LOL, this scene XD
Assalammualaikum ^___^ Dan hello,...
Wuu, terima kasih banyak banyak pada followers sbb sudi follow blog saya T^T Hehe, saya dengan rajinnya nak buatlah tutorial ini. Cara doodle, Part 2? Where another part 1? Oh I dont update yet, because part 1 I will teach you how to draw on paper, this time I want teach draw on computer.
All you need is. Photoshop or Pain Tool SAI. Dont have it? Go download it? Link? Go find yourself. Muahaha, Okay I'm sorry I dont have any link to download that software T___T Go ask to Uncle Awesome Google :3 and, kalau tiada tablet pun tak mengapa. Ala practice make perfect you know :] Dulu saya boleh je lukis tanpa tablet, guna sentuh sentuh kat laptop ni hah.
Kalau nak beli tablet belilah, tapi saya syorkan practice dulu guna mouse. Nanti kalau terus beli tablet, lukis je, kalau dah malas dah tak nak guna tablet, membazir je. Tablet paling murah RM210. Tablet saya jenis Genius Tablet, ada yang RM700+ Tapi kalau nak beli, sama ada nak beli Genius Tablet or Bamboo Tablet boleh je~ :D
Okay, after get all the software, open it, I use Photoshop to make doodle. Yeah, I dont know much how to draw using Paint Tool Sai T___T But for me, Photoshop is more easy that Paint Tool SAI because it can put the background and many more and... oh my english... sorry if there many grammar nazi in this entry, hehe~

First, open it, How? Aiyaa~
Just press CTRL + N. And just put 500 width and 700 height.

Pilih brush, ketebalan dia biarlah cuma dalam 3 je, kalau nak 10 pun boleh :p

Korang lukis lah ikut kreativiti korang, bagi yang masih bau dalam dunia doodle. Cubalah lukis bulat dulu, hehe. Lukis kepala guna apa2 style la. Saya selalu guna style manga. (Komik Jepun) Tak adalah 'manga' sangat, biasa biasa je. Saya sarankan, just sketch dulu tau, dengan menggunakan berus berwarna merah dulu, why? You will know after this.

Add some hat, hair, ears, and their face, not now yet, Just draw the whole body first.

And then,... lukislah, hehe, ini just sketch ma~

Okay, korang add layer baru, mcm mana?
Korang tekan yang saya anak panahkan tu. Bagi pengguna paint tool sai, pandai pandailah, ala tekan je mana-mana XD
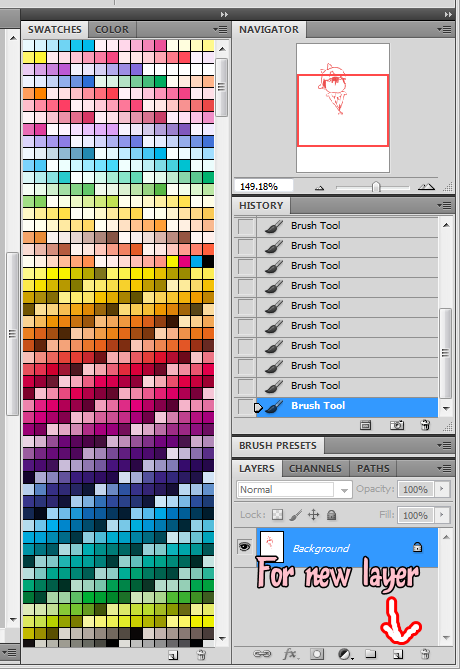
Untuk apa kegunaan layer lagi satu ini? Ok untuk layer yang baru ni, korng re-draw balik tapi menggunakan brush warna hitam, get it?

Cuba hilangkan sebentar layer yang brush warna merah tu, tengok le hasil dia mcm mana, okay ke tidak, tak faham? Macam ni, tick gmbr mata dekat layer yang korang sketch tadi yg guna brush merah, ok faham tak? Alahai sorry berbelit ayat

Inilah hasilnay, owh bolehlah~

Okay now, for the face... First, draw his eyebrow, and his eyes.

You can draw any kinds of eyes. Here the collection of eyes that you can draw. I like us A for doodle or fan art and B draw comic, and C to draw female character. And F is Upin&Ipin's eye and G is Boboiboy's eye. D is Winx Club's eye and so E is eye for male or scary character.


Just add the eyes, and the nose? Owh in my drawing skill. I did't put the nose XD and his mouth. Smilling or whatever :3

And here the result! Banananaaaaaaaaaaa.....

p.s : Character from Animonsta Studio (c)
and then, if you finish all of it, just save :) CTRL + ALT + S
Soooo, er.. faham ke tuto saya ini? Hehe~ Maaflah sebab berbelit belit ayat TT_TT And just that the result, Sorry I dont colour it yet, because I will teach you in next tutorial :] Insya Allah if I'm not lazy, hehe..
I'm sorry because I write this tuto with English + Malay.
Alright~ Dont forget tomorrow~(Sunday) Must watch TV3 at 7pm okay ;)


